If you have a subscription that offers mass deployment, you can deploy, configure and license RealVNC Connect using Microsoft Intune. Microsoft Intune can be used as an alternative to Group Policy for Azure AD joined devices.
Download the RealVNC Connect ADMX templates
ADMX templates for RealVNC Viewer and RealVNC Server are available at the bottom of their respective download pages on the RealVNC website.
Once downloaded, extract the ADMX and ADML files from the zip archive, making a note of the location.
Import custom ADMX and ADML administrative templates into Endpoint Manager
This is a Microsoft public preview feature. Read more here: https://docs.microsoft.com/en-us/mem/intune/configuration/administrative-templates-import-custom
Upload the ADMX and ADML files for use by the configuration profile
- Download the ADMX templates for the RealVNC Connect application that you want to configure with Intune
-
Sign in to the Microsoft Endpoint Manager
-
Navigate to Devices > Configuration profiles > Import ADMX > Import
-
Upload your files:
- ADMX file: Select the ADMX file you want to upload.
- ADML file for the default language: Select the ADML file you want to upload. Remember, you can add only one language file for each ADMX file you upload.
- Specify the language of the ADML file: Shows the ADML language of the file you uploaded.
Note: If you have previously uploaded older versions of the ADMX and ADML files, you must first delete the existing templates and any configuration profiles using the existing templates before uploading the updated files.
-
Click Next
-
In Review + Create, review your changes then click Create to import the files
-
When the import completes, your ADMX templates are shown in the list
Create a configuration profile to configure and license RealVNC Server and RealVNC Viewer
-
Sign in to the Microsoft Endpoint Manager
-
Navigate to Devices > Configuration profiles > Create profile
-
Enter the following properties:
-
Platform: Select Windows 10 and later.
-
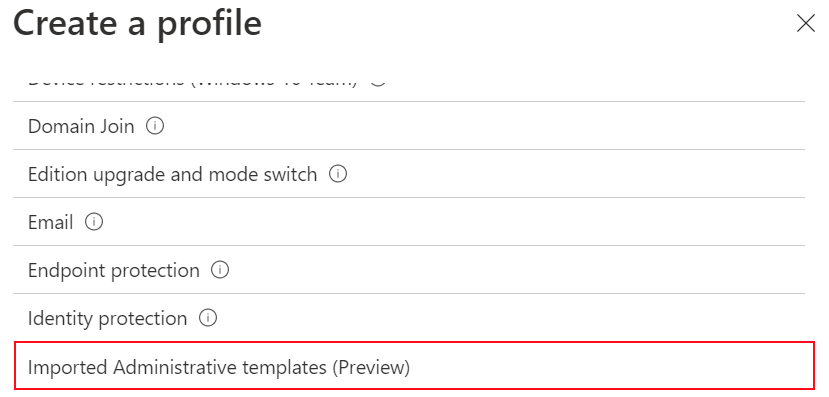
Profile: Select Templates > Imported Administrative templates (Preview):
-
-
Click Create
-
In Basics, enter the following properties then click Next
- Name: Enter a descriptive name for the profile. Name your profiles so you can easily identify them later. For example, a good profile name is ADMX: VNC Server for Windows.
- Description: Enter a description for the profile. This setting is optional, but recommended.
- In Configuration settings, select and configure the settings you want in your policy. When finished, click Next
-
In Scope tags (optional), assign a tag to filter the profile to specific IT groups. For more information about scope tags, see Use role-based access control (RBAC) and scope tags for distributed IT.
Click Next
-
In Assignments, select the user or groups that will receive your profile. For more information on assigning profiles, see Assign user and device profiles in Intune.
If the profile is assigned to user groups, then configured ADMX settings apply to any device that the user enrolls, and signs in to. If the profile is assigned to device groups, then configured ADMX settings apply to any user that signs into that device. This assignment happens if the ADMX setting is a computer configuration (
HKEY_LOCAL_MACHINE
), or a user configuration (HKEY_CURRENT_USER
). RealVNC Server uses device configuration, while RealVNC Viewer uses user configuration. Click Next. -
In Review + create, review your settings. When you click Create, your changes are saved and the profile is assigned and started to be deployed to the targeted devices.
To configure RealVNC Connect using Microsoft Intune you can ingest the VNC Connect ADMX templates into Intune and apply settings by using a Device Configuration Profile.
Create a new device configuration profile
- Log in to Microsoft Endpoint Manager
- Click Devices on left menu, then Configuration profiles
- Click Create profile
- Select Platform - Windows 10 and later, Templates, Custom, then click Create
- Enter a name (e.g. VNC Connect ADMX Templates), click Next
- Configuration setting: Leave blank and click Next (we'll edit this later)
- Configure Assignments: Configure which group(s) to apply the policy to e.g. All devices, click Next
- Applicability Rules: Configure any rules to use when determining whether to apply the policy to a device or leave blank, click Next
- On the Review + create screen, click Create
Ingest the ADMX templates for use by the configuration profile
- Download the ADMX templates for the RealVNC Connect application that you want to configure with Intune
- Log in to Microsoft Endpoint Manager
- Click Devices on left menu, then Configuration profiles, then click the profile that you want to edit e.g. VNC Connect ADMX Templates, created above
- Click Properties
- Click Edit next to Configuration settings
- Click Add, then populate the fields as shown below depending on the ADMX template you are importing
- RealVNC Server Licensing
- Name: The name of the row, e.g. VNC Server Licensing ADMX
- Description: An optional extended description
- OMA-URI:
./Device/Vendor/MSFT/Policy/ConfigOperations/ADMXInstall/VNCServer/Policy/VNCServerLicensing
- Data Type: String
- Value: The contents of the realvnc_licensing ADMX file
Open the realvnc_licensing ADMX template in Notepad and copy and paste the contents
- RealVNC Server Configuration
- Name: The name of the row, e.g. VNC Server Config ADMX
- Description: An optional extended description
- OMA-URI:
./Device/Vendor/MSFT/Policy/ConfigOperations/ADMXInstall/VNCServer/Policy/VNCServerConfig
- Data Type: String
- Value: The contents of the realvnc_vncserver ADMX file
Open the realvnc_vncserver ADMX template in Notepad and copy and paste the contents
- RealVNC Viewer Configuration
- Name: The name of the row, e.g. VNC Viewer Config ADMX
- Description: An optional extended description
- OMA-URI:
./Device/Vendor/MSFT/Policy/ConfigOperations/ADMXInstall/VNCViewer/Policy/VNCViewerConfig
- Data Type: String
- Value: The contents of the realvnc_vncviewer ADMX file
Open the realvnc_vncviewer ADMX template in Notepad and copy and paste the contents
- RealVNC Server Licensing
- Click Save, then Review+Save to check the OMA-URI you just created. Click Save
License RealVNC Server
- Log in to Microsoft Endpoint Manager
- Click Devices on left menu, then Configuration profiles, then click the profile you want to edit or create a new one
- Click Properties
- Click Edit next to Configuration settings
- Click Add, then populate the fields as below:
- Name: OfflineLicense
- Description: An optional extended description
- OMA-URI:
./Device/Vendor/MSFT/Policy/Config/VNCServer~Policy~Licensing/RealVNC_vncserver_Machine_vncserverlicense
- Data Type: String
- Value:
Note, replace OFFLINELICENSE with the VNC Connect 7.x offline license from the Deployment page of the RealVNC Connect Portal.
<enabled/>
<data id="Value" Value="OFFLINELICENSE"/>
- Click Save, then Review+Save to check the OMA-URI you just created. Click Save
Configure RealVNC Server
Before you can configure a policy setting, please ensure you have ingested the ADMX template via OMA-URI, above.
- Log in to Microsoft Endpoint Manager
- Click Devices on left menu, then Configuration profiles, then click the profile you want to edit or create a new one
- Click Properties
- Click Edit next to Configuration settings
- Click Add, then populate the fields as below:
- Name: The name of the setting, e.g. Permissions
- Description: An optional extended description
- OMA-URI:
./Device/Vendor/MSFT/Policy/Config/VNCServer~Policy~VNC_Server~vncserver_Machine/RealVNC_vncserver_Machine_Permissions
- The template format is:
./Device/Vendor/MSFT/Policy/Config/VNCServer~Policy~{CategoryPathFromADMX}/{SettingFromADMX}
-
Both {CategoryPathFromADMX} and {SettingFromADMX} are determined from analysing the ADMX template file. The table below shows the values to use for VNC Server.
CategoryPathFromADMXSettingFromADMXVNC_Server~vncserver_Machine RealVNC_vncserver_Machine_{parametername}
Replace {parametername} with the VNC Server parameter name
Note: if a particular parameter is not accepted, please refer to the ADMX file for the correct policy name
- The template format is:
- Data Type: String
-
Value: This depends on the type of parameter you are setting. Please refer to the below table.
Setting TypeValueTrue/False <enabled/> Text <enabled/>
<data id="Value" value="{parametervalue}"/>
Replace {parametervalue} with the text string
Note: ensure quotes are normal quotes and not smart quotes if copy and pasting!
- Click Save, then Review+Save to check the OMA-URI you just created. Click Save
Configure RealVNC Viewer
Before you can configure a policy setting, please ensure you have ingested the ADMX template via OMA-URI, above.
- Log in to Microsoft Endpoint Manager
- Click Devices on left menu, then Configuration profiles, then click the profile you want to edit or create a new one
- Click Properties
- Click Edit next to Configuration settings
- Click Add, then populate the fields as below:
- Name: The name of the setting, e.g. SessionRecordAllSessions
- Description: An optional extended description
- OMA-URI:
./User/Vendor/MSFT/Policy/Config/VNCViewer~Policy~vncviewer_User/RealVNC_vncviewer_User_SessionRecordAllSessions
- The template format is:
./User/Vendor/MSFT/Policy/Config/VNCViewer~Policy~{CategoryPathFromADMX}/{SettingFromADMX}
-
Both {CategoryPathFromADMX} and {SettingFromADMX} are determined from analysing the ADMX template file. The table below shows the values to use for VNC Viewer.
CategoryPathFromADMXSettingFromADMXvncviewer_User RealVNC_vncviewer_User_{parametername}
Replace {parametername} with the VNC Viewer parameter name
Note: if a particular parameter is not accepted, please refer to the ADMX file for the correct policy name
- The template format is:
- Data Type: String
-
Value: This depends on the type of parameter you are setting. Please refer to the below table.
Setting TypeValueTrue/False <enabled/> Text <enabled/>
<data id="Value" value="{parametervalue}"/>
Replace {parametervalue} with the text string
Note: ensure quotes are normal quotes and not smart quotes if copy and pasting!
- Click Save, then Review+Save to check the OMA-URI you just created. Click Save
Comments
If you're comfortable with PowerShell, I'd suggest using Proactive Remediations for this. That's what I'm doing & sofar, so good.
Hi Cory,
Thanks for your comment! We'd be interested in hearing more about this! Can you reach out to our support team here? https://help.realvnc.com/hc/en-us
Thanks,
Jack
You can import ADMX and ADML files into Microsoft Intune. Link: https://learn.microsoft.com/en-us/mem/intune/configuration/administrative-templates-import-custom
It's a public preview feature at the moment!
Hi,
Thanks for your comment! We're in the process of updating the article with the new feature but please note as it's a public preview, Microsoft may choose to revise/remove the feature in future.
Kind regards,
Jack
I don't find the ADMX into the VNC Viewer Download page...
Hi Alan,
The ADMX files are in the related download section towards the bottom of the page: https://www.realvnc.com/en/connect/download/viewer/#related-server-viewer-section
Thanks,
Jack
Hello, could you verify the link for downloading the ADMX.
It's not working...for the moment.
regards
Hi Vincent,
The download links can be found here: https://www.realvnc.com/en/connect/download/combined/#related-selection-section
The links appear to be OK for me, can you try them please?
Please sign in to leave a comment.